![]()
In this article, we will learn how to disable action in Power Automate in various ways instantly. Basically, if you are from a Nintex workflow background, you will expect that if some actions are not needed now, but might be needed in the future, or if you are doing some research where you want to test various types of actions in a single flow, then you need to disable the action which you don’t need.
Technically Power Automate doesn’t provide any options to disable an action like Nintex, but with some workarounds, we can disable it – better we could say this as skipping the execution of the particular action – because here in Power Automate, there are no ways to disable the action but skipping.
Disable Action in Power Automate in 3 ways (Action in Power Automate)
In this tutorial, we will learn how to disable an action in Power Automate in 3 ways:
1. Enable static result (Preview) – Power Automate Static result
This is the simplest approach among the other two, just click on the three dots menu for the action which you want to disable.
For this demo, we disable the “Stop sharing an item or a file” action.
Click on the three dots menu for your selected action.
Click on the “Static result (Preview)” link.

Once you click on the “Static result (Preview)” link, we will get the static result configuration window.
Enable the Static Result (Preview) toggle, by default this will be in disabled mode.

Click on the “Done” button, rest all configurations keep it as it is. Then save the flow.
Basically, with this configuration, we are saying irrespective of the flow action logic, just pass the execution as success with the status code 200 OK.
By the way, once we enable the static result for action, a new icon will be added that indicates “This Action has Static result configured”.

Now, let’s test this out.
Run the flow from the Test mode, from the right topmost corner.

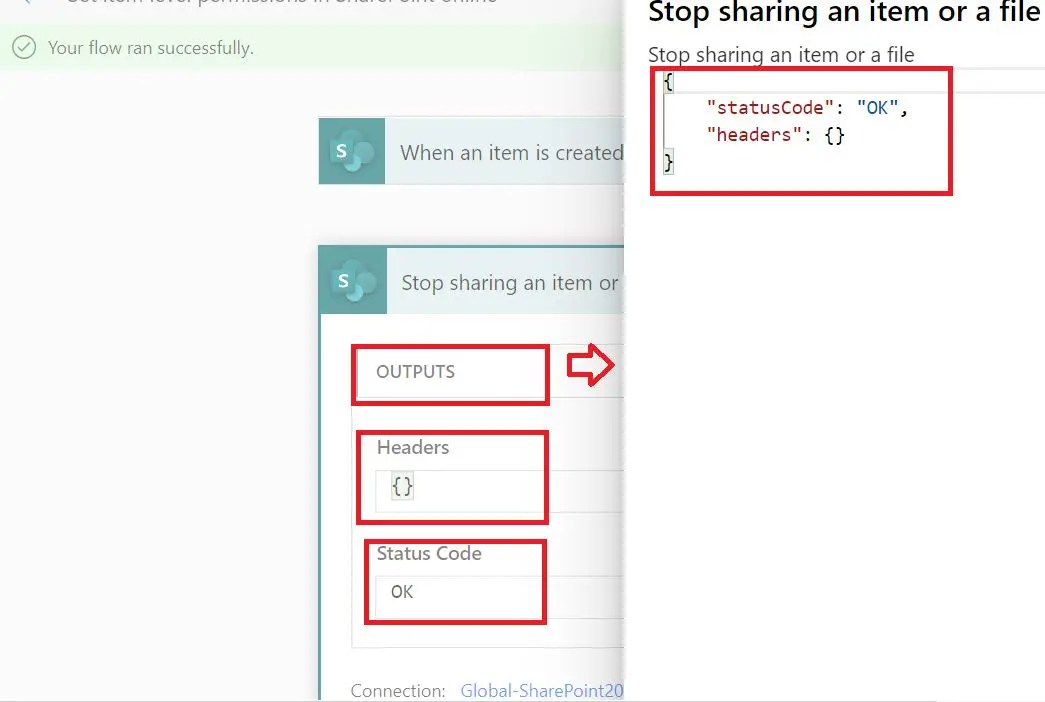
We can see that flow has been executed successfully, but wherever, we have enabled Static Result (Preview) mode, we could see the static result icon, let’s expand any of them.

Action execution status has been bypassed with the Status Code 200 OK.
2. Disable action in Power Automate using condition control
Just add a condition control, and add the condition as 1 equal to 2, which is never going to be true. So, keep all the actions that you don’t want to execute in the “Yes” sections.

3. Disable action in Power Automate using the Scope Control
For this technique, we need to know the error handling in Power Automate, for this refer to our previous article Exception handling in power automate using Try Catch Finally Scope.
Referring to the above exception handling in the Power Automate article, add three scope controls in your Power Automate, and inside the Finally Scope control add a condition control where check “isErrorOccured” equal to true.

In the “Yes” section, add all your actions but you need to ensure that your flow doesn’t have any exceptions or errors.
Notes:
- You need to ensure your flow doesn’t have any errors.
- You have executed your flow and seen your flow doesn’t throw any errors or exceptions, at this point you planned not to execute some actions for debugging purposes, then you can use this technique.
- For better control of this technique, you check the checkbox “is skipped” and rest all checkboxes keep as unchecked for the “Configure run after” settings.
- Out of these 3 techniques, this one is not reliable, because we don’t know when errors will come during the execution of the flow and if errors occur, this technique will fail. So, better to use the above 2 techniques, those will never fail.
Summary: What do we have here (Disable Action in Power Automate)?
Thus in this article, we have learned how quickly disable actions in Power Automate in various ways:
- Disable action in Power Automate using the Enable static result (Preview) technique.
- Disable action in Power Automate using the condition control technique.
- Disable action in Power Automate using the scope control technique.
See Also: Power Automate Tutorials
You may also like the below Power Automate Tutorials:
- In just 2 steps Copy and Paste action in Power Automate
- Exception handling in power automate using Try Catch Finally Scope
- Power Automate[Detailed]: set item level permissions in SharePoint online step by step with HTTP request
- Trigger Power Automate (Flow) based on condition in SharePoint Online
- Power Automate: Difference between Send an email notification (V3) Send an email (V2)
- Learn HTML table formatting using Microsoft Power Automate step by step
- Power Automate: How to Export and Import Microsoft Team Flows across environment
- [Fixed]: Error from token exchange: Bad Key authorization token in Power Automate
- SharePoint Online conditional row formatting based on a LOOKUP column value using JSON
- Scheduler Power Automate: Move Old documents in SharePoint Automatically using Scheduled Cloud Flow
- Conditionally show or hide columns in a SharePoint list
- Validate is it really Power Apps = Low Code No Code? Power Apps low code no code
- Explore Power Automate architecture
